Sunday, July 7, 2013

As American as Apple Pie


These last few weeks have been nothing short of amazing! First, I must give props to WomenVenture – without them or Katy Burke, we would not have been able to secure financing for our food truck!! Yes, you read that right, we are one gigantic step closer to opening up the Grill Works Truck!

Right now, we have targeted August to open our doors, so to speak, for events, parties and other weekend type festivities. I am hoping for the sooner, the better, but am being cautiously optimistic. Because the hard work has just begun – find the perfect truck to become Our Truck! We have become our American Dream, to own a family business. You’ll have to come out to see us once we are up and rolling.

To honor both this wonderful news as well as the celebration of our nation’s birth, I’ve decided to share a recipe that brought back childhood memories for those have tasted this pie. And to me, a wonderful meal can evoke nostalgia of our youth.

This pie does just that. It is buttery, sweet & tart with a caramel flaky crust. I’ve used both my own pie crust, which I will share with you soon enough & my great-grandmother loved so much she wanted MY recipe! But I have also used a store bought crust & it turns out quite nicely as well. Because Nanny was the inspiration for this, we named it after her too.

I hope that you enjoy this as much as I do!
Grandma Nanny’s Apple Pie

Prep Time: 30 Minutes
Cook Time: 1 Hour
Ready In: 1 Hour 30 Minutes
Servings: 8

INGREDIENTS:
1 recipe pastry for a 9 inch double crust pie

½ C unsalted butter
3 Tbsp AP Flour

¼ C Water
¼ C Applejack
½ C white sugar
½ C packed brown sugar
1 ½ tsp Cinnamon
Dash Nutmeg
¼ tsp Salt

¼ C Vanilla extract
¼ C Butter extract
1 Tbsp Lemon juice

4 Honeycrisp apples - peeled, cored & sliced
4 Granny Smith apples - peeled, cored & sliced

1/3 C Sanding Sugar

DIRECTIONS:
1. Preheat oven to 425° F. On low heat, slowly melt the butter in a saucepan. Stir in flour to make a paste.
2. Add water, Applejack, white & brown sugar, cinnamon, nutmeg & salt and bring to a boil.
3. Reduce temperature and let simmer for 5 minutes. Remove from heat.
4. Add vanilla & lemon juice.
5. Place the bottom crust in your pan. Fill with apples, mounded slightly. Gently pour, very slowly, ¾ of syrup into apples so that it does not run off.
6. Reserve remaining syrup & keep warm (putting it on the back of stove near where the oven vents its heat will do this for you).
7. Cover with top crust & crimp well to prevent leaking. Cut vents in top crust to allow escape of steam.
8. Bake 15 minutes in the preheated oven. Reduce the temperature to 350° F. Baking for about an additional 30 minutes.
9. Brush crust with reserved syrup in last 5-10 minutes of baking & dust heavily with sanding sugar. 

Tuesday, June 18, 2013

Get your MoJo back

I need to share some really good news with you before we get started with everything. I recently had an interview with Urmila Ramakrishnan, the Food Truck journalist for the Minneapolis St Paul Business Journal. We’re going to get a follow up interview at our commissary with her as well! Finally, I had thought that WomenVenture was not going to be able to review us for funding until July, but they are going to this week! Okay, thanks for that commercial break & now on with the show…

This was a hard decision to make. I really love this recipe and it is one of my trade secrets. Since it is near and dear to my heart, I was kind of reluctant to share. While I’ve given to close friends and family, it’s really just so good & simple that I finally came realize that I needed to let you in on this too.

This all began with my quest for the perfect Cuban sandwich. Now, I don’t claim to have made that (yet!) but this pork recipe was a wonderful step in the right direction.

It all started about a couple of years ago when I first discovered the Cuban sandwich. It was hot and toasty; savory with a touch of sour; and it makes my mouth water just thinking about it. I tried one from the Happy Gnome in St Paul. Man oh man was it good! And that sandwich drove me to find another and another, to taste the best the Twin Cities had to offer. I enjoyed Simply Steve’s Food Truck’s Cuban Burrito, which is the Chipotle version of a Cuban sandwich – it’s just as big too! But the moment of transcendence for me came when I visited 3 Squares in Maple Grove. I knew that had great food. I’d gotten take out from the restaurant before, but this time I was finally able to convince the whole family to go there to eat.

I, of course, had read the menu & checked out the place online, included their website, Yelp & Facebook. So I pretty much had my mind made up even before we pulled into the parking lot. The funny thing is now I can’t remember what that was anymore. Probably because I forgot to take into account that, like many great places, they have daily specials. That’s where the chefs get to show off their handiwork & impress their guests with their talent.

You already have an idea of where this going, no doubt. Yes, one of the specials that night was a Cuban sandwich with Sweet Potato Fries. Mere words cannot describe the bliss from that gastronomic experience of that night. So many delicious things and the Cuban they served was absolutely incredible!

And this was the inspiration for my MoJo Pork recipe. Most Cuban sandwiches start with a Pork Butt and include either sour orange juice (1/2 orange & 1/2 lime juice mixed) or Seville orange juice. I didn’t have either, nor did I know where to find Seville orange juice. I substituted Grapefruit instead and the rest was divine! You will not believe the easy of this recipe & how so few ingredients come together to make it. It does take a few days prep ahead, but it is well worth the wait, I assure you. So far, I don’t think I’ve steered ya wrong yet, not intending to start now either!

So let’s get cookin’!
 
 
MoJo Pork

4-6 lbs. Pork Butt
2 large Grapefruits, peeled & segmented, save all the juice possible
1 head garlic, peeled & crushed
1 medium onion, medium dice
2 tsp. salt
1 tsp. oregano
1 tsp. B. Pepper
1/2 Cup Olive oil
 

Puree all ingredients except pork with an immersion blender.
Stab pork with knife all over to let the marinade penetrate.
Put pork into a gallon Ziploc bag, pour puree over it & seal. Make sure marinade covers the entire butt.
Marinade 2-3 days.
Slow roast 2 ½ -3 ½ hour foil covered at 300, uncovering last ½ hour to brown.
Shred pork. Pour cooking liquid over shredded pork to reabsorb.
Cool overnight.
In a non-stick skillet on medium heat, brown pork on both sides until crispy & serve.

Sunday, May 26, 2013

Good for the body & soul


A couple of weeks ago, I was really ill with a nasty stomach flu that was going around. I happened to get it from my preschooler and then so did the rest of the family. When I was finally up to eating, the only thing I wanted was chicken soup. And boy did it make me feel nice! It was like a warm bowl of healthy goodness.

This got me to thinking about the other times I had been under the weather. Most of them started the road to recovery with a bowl of chicken soup in one form or another. I usually make myself a yummy bowl of soup that I’ve spiked with cooked rice & cilantro. It is so delicious. 

Another chicken soup I love & infuses me with well-being is a Thai version called Tom Yum soup. The very best I’ve had is from a Thai restaurant near me called Lemongrass. Their Chicken Tom Yum soup is spicy, rich & makes my mouth water just thinking about it.

Soup is generally something I don’t follow a recipe for since I’ve made it so many times. I normally look at the ingredients & wing it from there without looking at amounts. Making soup is a simple and wonderful thing. It is versatile and forgiving. And one of the best things about soup is that everyone loves it and it makes you feel wonderful eating a great soup too!

So I did take the time to write these favorite soups down and here they are. The Tom Yum soup might have a few unusual ingredients not found in the average American’s pantry or spice cupboard. It may take a trip to the local oriental market to get things like galangal, kaffir lime leaves or bitter melon; trust me, it is well worth it.

I hope you find these recipes as edifying to you as they were for me.

 
Chicken & Rice soup with Cilantro

Prep Time: 20 Minutes
Cook Time: 40 Minutes
Ready in: about 1 Hour
Servings: 6

Ingredients
1 tsp butter
2 medium onions, small dice
2 carrots, small dice
2 ribs celery, small dice
2 tsp garlic, minced
½ cup sherry wine
1 tsp poultry seasoning
½ tsp granulated garlic
½ tsp granulated onion
4 cups chicken stock*
1 ½ cup chicken, chopped
1 cup cooked rice
1 bunch cilantro, minced

Directions
In a large pot, melt butter on low heat.
Sweat onions, carrots & celery until tender.
Add garlic & cook for about 1 more minute. * If using chicken base instead of stock, add base with garlic.
Deglaze with sherry. Add spices. Cook for 5 minutes until alcohol is burned off.
Add chicken stock. Bring to boil, then reduce to simmer.
Add chicken & simmer for 10 minutes.
Add rice, then simmer for 2-3 minutes or until rice is hot.
Remove from heat & add cilantro

Tom Yum Koong Soup  

Prep Time: 20 Minutes
Cook Time: 40 Minutes
Ready in: about 1 Hour
Servings: 6

"This Thai soup with straw mushrooms starts with a stock made from chicken combined with slices of galangal, kaffir lime leaves, lemon grass and fish sauce. Garnish with cilantro."

INGREDIENTS:
1 tsp sesame oil
4 white onions, julienne
2 bitter melon, seeded & julienne
1/2 cup oyster sauce
4 cups chicken broth
2 lemon grass
4 kaffir lime leaves
4 slices galangal, minced
4 bird's eye chiles (*optional)
12 green onion, diced
1 1/2 tablespoons fish sauce
1 1/2 limes, juiced
1 teaspoon white sugar
1 teaspoon thai chile paste (like sriracha)
8 straw mushrooms, halved
15-20 cilantro leaves

DIRECTIONS:
Trim lemongrass and cut into small matchstick size pieces. Or leave in larger pieces to remove later.
In a large pot, sauté white onions in sesame oil until translucent, add bitter melon. Sauté for about 2-3 minutes
Add oyster sauce, stock, lemon grass, kaffir lime leaves, galangal, bird eye chilies*, green onions, fish sauce, lime juice, sugar and chili paste to a pot then bring to a boil, simmer 25 minutes.
Bring to boil, after boiling for 5 minutes, add mushrooms. Cook for further 10 minutes or until mushrooms are tender and heated through.
Remove lemongrass (if not soften and tender enough to eat) and lime leaves.
Garnish with cilantro.

“Me want cookie!” - Cookie Monster


Lately, I have noticing there are a lot, I mean, A LOT of peanut butter cookie recipes being posted on Pinterest lately. Sometimes I feel like I can’t get by 4 posts without seeing another one. And most of them have unsubstantiated claims like “Only 4 ingredidents1” or “gluten free!” but when you get to the actual recipe, you find it had 12 ingredients and at least one is flour.

I have decided to throw my hat into the arena for this. Because if there is one thing I love better than donuts, it’s peanut butter! My mom can attest to this addiction came from a very young age. She has a picture of me & my brother when we have the infamous Peanut Butter & Cheese fight – this was when you could get both in a squeeze-able container. If you substitute peanut butter for green eggs & ham, then I’m right with you Sam I Am!

This recipe has been tweeted and twisted and turned a bit. As usual, when I was working on it, I grabbed as many Peanut Butter cookie recipes as I could find, then compared them all to one another to see what the major & minor differences were. Most were the same. Except one. It called itself “The Impossible Peanut Butter Cookie” and I agreed with the title. This cookie had no flour and only 3 ingredients – Peanut Butter, sugar & eggs. I thought, no way this can work! There just no way, there’s no flour to give texture or build off the gluten, no leavening – this thing is just going to melt into a giant puddle on the pan. So I set that recipe aside and worked on the rest to make, what sounded like on paper, a really great cookie.

It was okay. Nothing special. Yeah, it was a peanut butter cookie, so that made it delicious, but it wasn’t anything to write home about or bring to work to say, hey try this! I decided to look at the impossible cookie again. I made a small batch, because I didn’t want to waste my precious ingredients. Lo & behold – it was really good! It held its shape well enough that pressing it was necessary and it worked great making peanut butter blossoms too! But I wanted more – you’ve never heard that from me before have you? ;)

Now was the time to put on my culinary thinking cap & put all of the years of school and cooking & baking to work. What could I do to bring out the peanut butter flavor & truly delight a PB head like me?

The final product doubled the number of ingredients to six. Peanut butter (of course), eggs, brown & white sugar (the original recipe only called for white) vanilla & the curveball – curry powder. Believe it or not, the curry truly brought out the flavor of the peanut butter & it was such a minute amount that it is almost undetectable. So if you love peanut butter as much as I do, these are the cookies for you!

Peanut Butter Cookies

Total Time: 12 mins
Yield: 18 cookies

Ingredients
1 cup peanut butter (your choice, smooth or chunky)
1/2 cup granulated sugar
1/2 cup brown sugar
1 large egg
1/16 tsp curry powder
1 tsp vanilla extract
sugar, for rolling (optional)

Directions
Mix peanut butter, both sugars, curry, vanilla and egg together until smooth.
Drop by teaspoon onto cookie sheet two inches apart. If desired, roll in extra sugar before placing on cookie sheet.
Press with fork; press again in opposite direction.*
Bake 8-9 minutes at 350 degrees Fahrenheit.
Do not brown; do not over bake.

*If making Peanut Butter Blossoms, roll balls in sugar & do not flatten before baking. Pressing the kiss into the cookie after it comes out of the oven when flatten the cookie.

Wednesday, May 15, 2013

The way the cookie crumbles


This week was a friend’s birthday and I wanted to surprise her with a birthday treat. So I had some other people ‘casually’ ask her what kind of sweets she likes and it came down to chocolate.

While chocolate is a pretty easy choice for bringing a dessert, but the first thing that springs to mind was Chocolate Chip Cookies. Now if you know me like I know me, making the recipe off the back of the Nestle Toll House chips bag wasn’t going to cut it, by a long shot. Especially since the idea was to have a really great cookie. I am not saying those cookies are good, they aren’t, but I wanted something more. Something that really brought out the chocolate in the cookies & made them more than ordinary.

So that got me thinking about what enhances chocolate. I did some research and found there are a few things that do the trick. But I wasn’t convinced adding instant coffee, red peppercorns or chiles were the way to go necessarily. Maybe I was simply overthinking it? So I got back to the drawing board & grabbed about 7 or 8 different chocolate chips cookie recipes that had high rates and compared them, and yes I did include the Nestle Toll House one; it’s a classic and it was appropriate to be there.

A couple of things stood out on some unique recipes, one by Elizabeth Faulkner and the other boasting to be The Best NY Times Cookie. They both used bread and cake flour instead of AP flour. Now I don’t keep any other flours at home except AP cuz it is easy enough to create them from ingredients I have on hand. The other thing was resting the dough, at least overnight.

That seemed to make no sense to me – rest cookie dough? Why? Well here’s why. Like in pie dough, the flour needs to hydrate and because there is not actual water in the dough, it must get it from the eggs & butter. The water in them is more gelatinous, the one recipe explained so it takes more time to hydrate the flour. If you’ve ever made pie dough & let it rest in the fridge for ½ hour, you know what I mean as how different that time makes from before & after.

I also found that brown sugar enhances the chocolate too. Since more brown sugar lends to a chewier cookie, I replaced all of the white sugar with brown. For the substitution for the bread flour, I added 1tsp of Vital Gluten to each cup of AP Flour. I also added 1 Tablespoons of cornstarch to each cup of AP flour the recipe called for as cake flour (taking that tablespoon out of the flour measure on the AP for cake too – if that makes sense.) To mix things up a bit more, I used ½ semi-sweet chips & ½ dark chocolate chips, added butter extract with the vanilla extract & did include some instant coffee.

Now I know some of you are asking, what is vital gluten & butter extract & where do I find them. Vital Gluten is wheat protein flour; I buy mine either at the health food store or in the baking aisle with the Red Bob’s Mill product, usually by the yeast. Butter extract is a flavoring used to give a buttery taste to baked goods without having to add additional butter to the recipe. I find it either at a cake decorating store or even at my local Walmart in their cake decorating supplies area. However, the amounts are pretty small, so you could skip either one, but the cookies got rave reviews.

I made a double batch but had to bake one off immediately & couldn’t let it rest as I needed it the next day. That’s the one I brought in & everyone loved. With that in mind, each batch makes about 60 cookies.

*** Update - if you do let the dough rest, you lose about a dozen cookies. I just scooped by 72 hour rested batch and only got about 48 cookies***

Now that I’ve bored you with all of the technical details, here is the recipe I know you really wanted.


Chocolate Chip Cookies, Best
Makes about 60 cookies unrested dough; 48 cookies rested dough
 
 Ingredients:
  • 3 ½ C + 1 tbsp. + 1 tsp. AP flour
  • 2 tbsp. cornstarch
  • 1 2/3 tsp. vital gluten
  • 1 ¼ tsp. baking soda
  • 1 ½ tsp. baking powder
  • 2 tsp. kosher salt
  • 2 ½ sticks (1 1/4 cups) unsalted butter
  • 2 2/3 C packed brown sugar
  • 2 eggs
  • 1 tsp. instant coffee crystals (optional – for a stronger chocolate flavor*)
  • 2 tsp. vanilla extract
  • 2 tsp. butter extract
  • 10 oz. semi-sweet chocolate chips
  • 10 oz. dark chocolate chips

Preparation:
  1. Mix together flour, cornstarch, gluten, baking soda, & baking powder into a medium bowl.
  2. In a large bowl (preferably of a stand mixer) cream butter, sugar & salt together (using paddle attachment) until very light, about 5 minutes.
  3. Beat in the eggs, one at a time, making sure they are fully incorporated before adding the next.* If adding coffee, add after 1st egg.
  4. Mix in the vanilla & butter extract.
  5. On low speed, add the dry ingredients and mix until just combined, only 5-10 seconds.
  6. Gently incorporate the chocolate into the dough.
  7. Press plastic wrap against the dough and refrigerate 48 hours (at least 24, can be up to 72 hours). Dough can be used in batches, if desired.
  8. When ready to bake, preheat oven to 350 degrees.
  9. Line baking sheets with parchment paper.
  10. Scoop golf-ball sized dough balls onto baking sheet, making sure to leave about 1” between each.
  11. Bake 7 minutes, rotate pans & bake for an additional 7 minutes until golden brown but still soft.
  12. Transfer sheet to a wire rack and cool 10 minutes, then move cookies onto the rack or other surface to continue to cool.
  13. Repeat, as needed, and in as many batches as desired, until all the dough is used.
  14. Eat warm and make sure you have a napkin near (for crumbs, melted chocolate, and the drool that will inevitably accumulate due to the overwhelming deliciousness)!

Sunday, April 14, 2013

Spicy Pig Candy


Ingredients

1 lb thick cut applewood smoked bacon
2 c white sugar
1 heaping spoonful sriracha
2 tsp garlic powder
1 tsp brewer’s yeast

 
 Directions

Mix all but bacon until resembles brown sugar in consistency
Toss bacon in sugar mix & coat well
Bake at 325 on a cookie sheet with a baking rack for about 15-20 minutes or until well browned, rotating at least one time.

Red Enchilada Sauce

Servings: about 10

Ingredients
4 tbsp chili powder
6 tbsp flour
2 tsp cocoa powder
2 tsp granulated garlic
1 ½ tsp ground oregano
1 tsp paprika
1 ½ tsp salt
1 tsp black pepper
¼ c dried onions, ground
2 c water
1 tsp lime juice
1 (29 ounce) can tomato sauce

Directions
Combine all dry ingredients in a medium saucepan.
Whisking constantly, slowly add enough of the water to make a thin paste & is well combine.
Add rest of water.
Over medium heat bring to a boil, stirring constantly, until mixture thickens.
Whisk in tomato sauce

Pasties, Bacon & Enchiladas; oh my…

This has been a really great week. Work has been ok for a change – that is, where I am employed until our food truck opens. I also got to see a good friend last weekend, who I haven’t seen in like ten years & we celebrated his 40th birthday; I got to do a bit of cooking (like usual) and had some very positive meetings for the food truck as well.
 

We’ve got a commissary lined up for the truck! That’s so excited & I was really pumped up when I got the news! Though I can’t really talk too much about it, it’s in a super location, the guy who owns it is awesome and the kitchen is just about perfect for what we need! On top of that, I meet with one of the financial folks I’ve been working with and she told us that we are now ‘bankable’! This was the shot in the arm I so badly needed. I also heard back from two other financial companies who are looking at us for backing as well.
 

Catering job offers keep coming up! It is so amazing & pushes us to get this thing off the ground. When I shared this at the meeting I had with Women Venture, she was very excited for us too!


A buddy of mine opened his brick & mortar restaurant this week. You might have heard of them - Potter's Pasties. They’re at 1828 Como Ave SE Minneapolis, MN 55414. Since their truck continues to be out, you can get your pasty (that’s past-ee not paste-y) love as much and often as needed. I got my fix on opening night which was Thursday. Potter’s shares the building with Joe’s Market who is in the front (look at the back of the building for the Red & Blue door for Potter’s) where I used to get my Ben & Jerry’s all the time. Joe’s used to carry all of the great unusual flavors that the big box stores don’t – just another reason for me to go back; as if getting an edible hand warmer wasn’t a good enough one!


One kinda fun fact, now that we’ve switched off our DirecTV and gone Roku: the kids are getting into the oddest shows. I wouldn’t think that Psych would hold their interest, but they love it; particularly looking for the Pineapple in each episode. Don’t get me wrong, I’ve got nothing against DTV, it was that I couldn’t justify spending $90 a month on TV.
 

Okay on the cooking part of the program!
 

This week’s recipes are:
 

Spicy Pig Candy & Enchilada Sauce
 

I know, I know; our truck is not going to be a Mexican themed truck. I hear that clearly. We’re Diner-style gourmet comfort food – Where the Diner meets the Street; but I have always loved Tex-Mex as well as Asian cuisine. For a time, I spent a portion of my culinary career doing Tex-Mex & Tex-Mex/ Asian fusion. So those flavors hold a near & dear place in my heart. And while these two recipes are not fusion, there’s an Asian influence in the Pig Candy & I think that Enchilada sauce speaks for itself.

Tuesday, March 26, 2013

What a wich


So this weekend I was toying with the idea of making a low carb chip/ snacky thing. I like Rutabagas & thought that might be the ticket. I picked one up, peeled it and sliced it on the lowest setting on my mandolin. Then I simmered it until tender in salted vinegar water. And boy was it tasty when it came out! Then I cooled it down and threw it into the fryer and rubbed my hands - eagerly awaiting a crispy chip like thing. [Insert buzzer sound here] WRONG! I think I should have fried them while hot or not blanched them in the water at all cuz I ended up with soggy, oil chips. Maybe take two will do the trick.

Anyways, I got lost down that rabbit hole; let us come back to the subject at hand.

This is in honor of St Patrick’s Day & my Great Gramma who was born in Ireland.

Have you ever taken a bite of something that was so good that you had to share it with someone? Any parents out there probably are nodding their collective heads in a resounding YES! Parents want to expand their kid’s lives and one way we do this is by having them try new things.

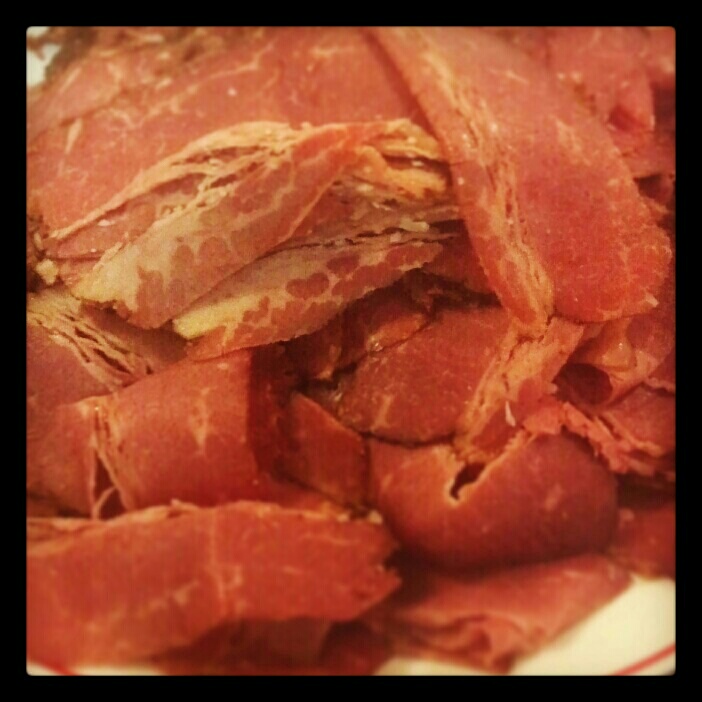
But I am not talking about something new. I’m talking about a sandwich that has been around for decades. It was a Reuben. This by itself doesn’t sound like anything special or impressive. When I made this one, I made a sub along with it cuz I was really hungry & we didn’t have any chips or snacky stuff to go with it. Plus I was craving a Reuben to make with the corned beef recipe that was inspired by my mom.

The sad part about this absolutely incredible sandwich? I gave half to my wife & afterwards my sub sandwich tasted terrible in comparison. I mean I ate half of it before I tried the Reuben and while it wasn’t super fantastic, it was still pretty good.  Now while I can’t guarantee that your Reuben sandwich will be as transcendent as mine was (and that’s because I used my secret recipe for 1,000 island dressing on mine), what I can promise is one of the finest Corned Beefs you might ever try.


Corned Beef Brisket

Ingredients

1 Corned Beef brisket
12 to16 oz dark beer
 2 cups brown sugar
 ½ cup granulated garlic
 2 tablespoon dry mustard

Directions

Mix brown sugar, garlic & mustard together & rub into corned beef. Wrap & rest in refrigerator for about 1 hour.

Preheat oven to 350°.

Put corned beef into roasting pan and surround by beer. Cover with foil & bake for about 1 ½ hours. Cool in braising liquid, rest 24 hours and slice thin.

My other Addiction


As a kid, I never could get enough of it. Well, who am I kidding, I still could eat it morning, noon & night. I’m talking about one of my favorite condiments in the pantry – Peanut Butter. I could eat it on most anything; yes most anything, not anything. I do draw the line somewhere. I haven’t come across that line just yet, but I will let you know when I do. I blame this on my mom.  She loves; I mean that she LOVES mustard. Any kind and on anything. And yes, anything, including pancakes with or without syrup. Trust me, I’ve seen it. It isn’t pretty.

But we aren’t talking mustard, that’s another show. We’re talking Peanut Butter. Mmm peanut butter. Oh how I love thee. Once I got two 5 pounds jar of Peter Pan and a cornucopia of PB related treats – boy was that was a great birthday! Also, if I ever see a PB cookie, don’t even ask if you can have it, cuz it’s mine. I might be talked into sharing a small piece, maybe, just maybe.

For years, I have searched for the perfect PB cookie and this Christmas I finally found it. The original recipe had just three ingredients. This made me skeptical. I mean, I have a background in baking & this cookie recipe had no FLOUR in it! What?!? This makes no sense, I thought to myself. There’s no way it will work. Nevertheless, I tried it out because after all, it did have PB in it.

WOW! It was really good! But if you know me like I know me, I couldn’t leave good enough alone. So I played with it a bit and gave a twist or two to the recipe. I ended up adding three more ingredients to the original recipe, yet there is still no flour so they are gluten free as long as your PB is too. Don’t knock the curry powder here – it is very subtle & serves to bring the peanutiness out.


Peanut Butter Cookies

  • Total Time: 12 mins
  • Yield: 18 cookies

Ingredients

    • 1 cup peanut butter ( your choice, smooth or chunky)
    • 1/2 cup granulated sugar
    • 1/2 cup brown sugar
    • 1 large egg
    • 1/16 tsp curry powder
    • 1 tsp vanilla extract
    • sugar, for rolling or dusting (optional – I like sanding sugar best)

Directions

  1. Mix peanut butter, both sugars, curry, vanilla and egg together until smooth.
  2. Drop by teaspoon onto cookie sheet two inches apart. If desired, roll in extra sugar before placing on cookie sheet.
  3. Press with fork; press again in opposite direction.*
  4. Bake 8-9 minutes at 350 degrees Fahrenheit.
  5. Do not brown; do not over bake.

*If making Peanut Butter Blossoms, roll balls in sugar & do not flatten before baking.

From New Orleans, with love


Okay. It’s time to admit it. Time to put it out for the world to read – no I don’t even pretend to believe that the world is reading this, but they could!

I love donuts. More than love, dare I say it, I lust for donuts! My mouth begins to water at the mere thought of a fluffy, delectable, sugary fried pillow of dough maybe wrapped in chocolate, possibly filled with pastry cream… If I were Superman, Donuts would be my Kryptonite.

There – I’ve said it; and even if this were a stage of some kind of remedial healing or donut therapy, I reject that notion and substitute my own. I will never, ever give up donuts!

I have tried them in most parts of the country I’ve visited and don’t think there is ever a distance I would not consider driving to get a great donut. One of the best I’ve had locally was at the now closed Hans Bakery in Anoka. I think that it was there that my parents introduced me to my donut addiction. Currently, my top honors goes to Mojo Monkey Donuts in St Paul (love her PB & J Bismarck and Chai donut holes!) & can’t wait to try Glam Doll Donuts in Mpls soon!

But for whatever reason, maybe it was fear or perhaps lack of knowledge; I’m not sure, but I’ve never made my own donuts until now. I think part of the reason I forced myself into doing this was trying the wonderful Beignets from the Cajun 2 Geaux food truck. Tim makes the lightest, fluffiest beignets I have ever had. And when Food Truck season was over, I needed my fix satisfied. There is nothing like having a HOT, fresh donut… why do you think mini-donuts sell so well at fairs?

And as promised, I tried out this Beignet recipe and it was fantastic! Since I just got a new fryer, I couldn’t think of a better way to christen it than this! While the cornmeal eluded me in my pantry, the recipe called for only a small amount, so I felt ok omitting it. Next time I will include it as I’m sure it adds a nice texture to them.


Beignets


Prep Time: 25 min              Inactive Prep Time: 1 hour                Cook Time: 30 min             Yield: about 3 dozen


Ingredients

  • 1 package active dry yeast
  • 11/2 cups milk
  • 1/4 cup sugar
  • 1/4 cup melted unsalted butter
  • 1 large egg
  • 4 1/2 cups all-purpose flour
  • 1 tablespoon cornmeal
  • 1 teaspoon salt
  • Vegetable oil, for frying
  • Powdered Sugar


Directions

1.     In the bowl of an electric mixer fitted with a dough hook, combine the yeast, milk, sugar, and butter, and mix well for 2 minutes. Add the egg, and mix well. Add 4 cups of the flour, the cornmeal and salt. Beat at low speed until all the flour is incorporated, then on medium speed until a ball of dough forms, adding more flour as needed if too sticky.

2.     Remove from the mixer, form into a ball, and place in a lightly oiled bowl. Cover and let rise in a warm place until nearly doubled, about 1 hour.

3.     Heat the fryer to 360°F.

4.     Turn out the dough onto a lightly floured surface and pat into a thick rectangle, about 1-inch thick. Roll out until about 1/4-inch thick, and with a sharp knife, cut the dough into rectangles, about 2 by 3 inch.

5.     Drop the dough into the hot oil, being careful not to overcrowd the beignets as they are cooking, and turning them constantly to cook on all sides until golden, about 3 minutes per batch. Remove the beignets from the oil with a slotted spoon and drain on paper towels.

6.     Serve the beignets warm, tossed a paper bag of powdered sugar.


(He makes Sopapillas instead of Beignets – this recipe works great for both, subbing honey for powdered sugar for Sopapillas)